
Visual aids by Dr.Pavoni
![]()
![]()
![]()
![]()
![]()
![]()
![]()
![]()
If you're having trouble viewing the schematics go to TOOLS/INTERNET OPTIONS/ADVANCED/MULTIMEDIA in IE and uncheck Enable automatic image resizing. This could be a problem if you are using Internet Explorer 6.0 and above.
This is a rough schematic of the electrical circuit of my machine. Mfg. date Feb. 1996. 120 volt model. The low heat circuit are terminals A and C. The high heat circuit are terminals B and D.
This is a rough wiring schematic of an older Pavoni with a three position switch (Lo/Off/HI) and pilot light. If you don't have a light, disregard the wires going to the light.
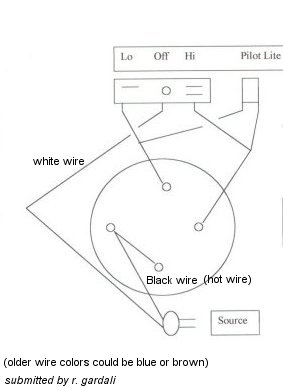
This is a rough wiring schematic of the newest Europiccola. Mfg. date 2000. 120 volt model.
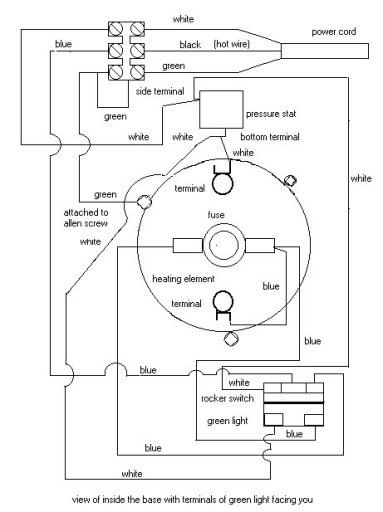
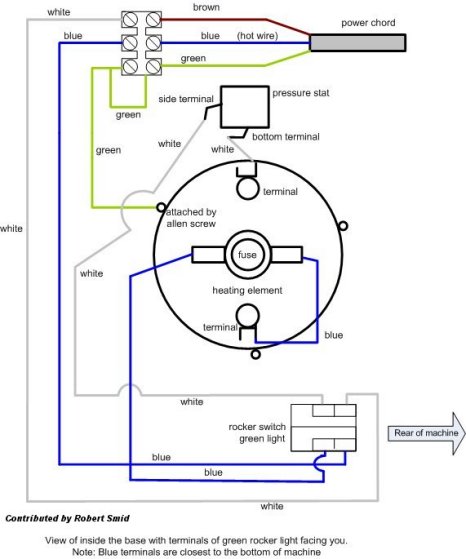
This is a rough wiring schematic of a 230 volt Europiccola. Mfg. date March 1998.
This is a rough wiring schematic of a 230 volt European Professional Mfg. date April 2001
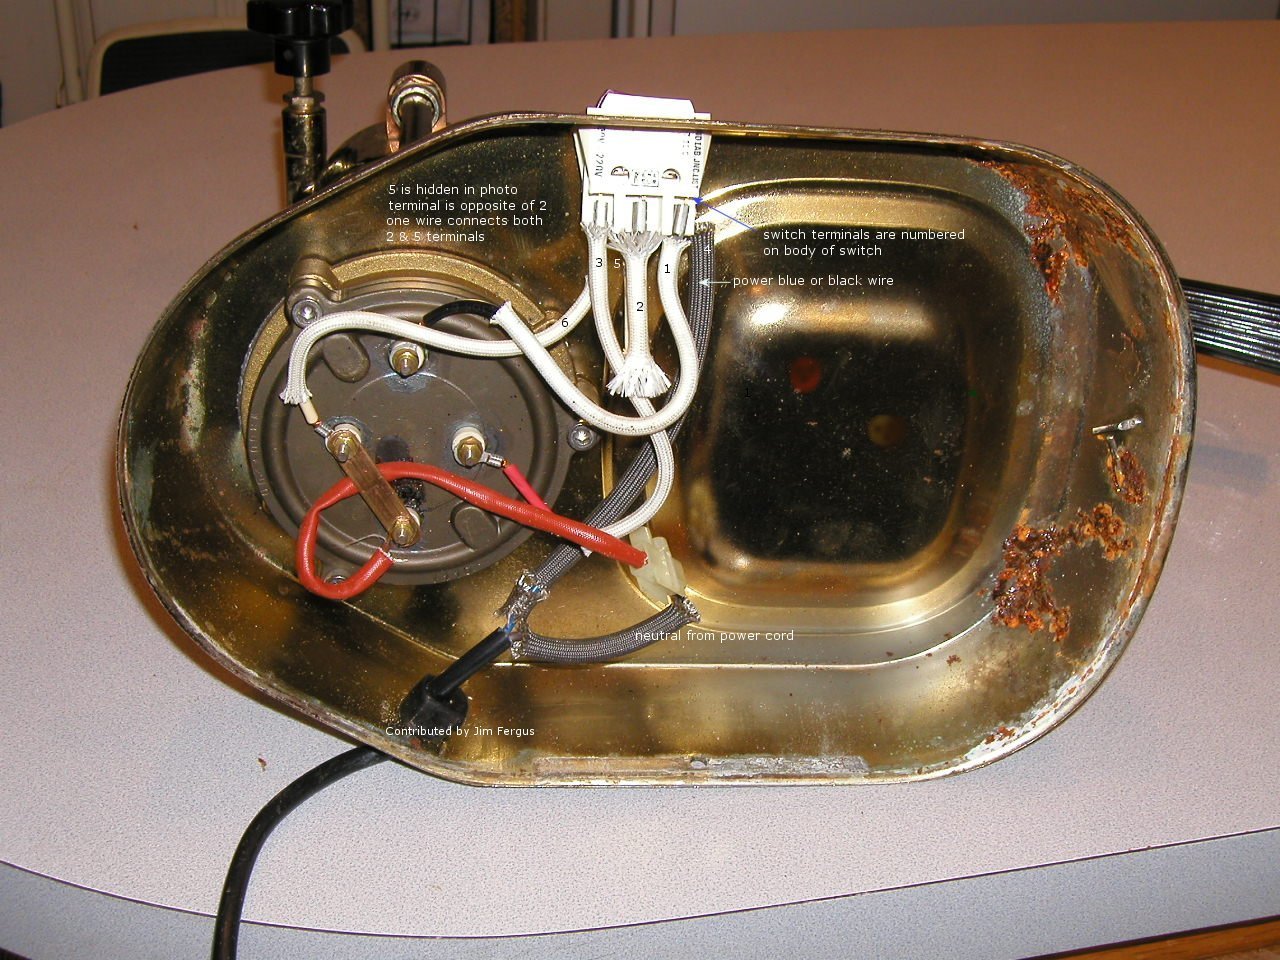
This is a wiring photo of a Europiccola circa 1970's that has a white two toggle switch body which is different than the current black two toggle switch body. The fuse is under the brass hold down bar that is connecting two of the heating element terminals. More of this in detail in the TROUBLESHOOTING section.
Shown are the retaining ring pliers, small screwdriver and ViperLube®.
10MM and 14MM wrenches and a wooden clothes pin.
Adjustable wrench, ViperLube®, Multitester, large philips screwdriver, flat tip screwdriver, and needle nose pliers
![]()
![]()
.jpg)
© 2010 Francesco Ceccarelli. All rights reserved.
Reproduction in any form without permission is prohibited.